How to install and setup Radmin
Here are the steps you must take in order to establish Radmin connection: 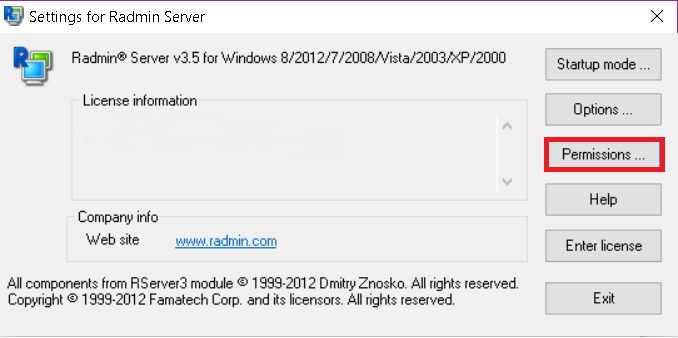 Click "Permissions", make sure Radmin security is selected and then click the corresponding "Permissions" button. 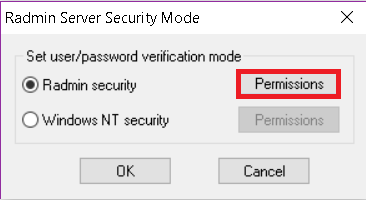 Click "Add user", choose username and password and click OK, OK. Then exit Radmin Server settings.Then please check all the boxes for the desired connection types you want the selected user to have. 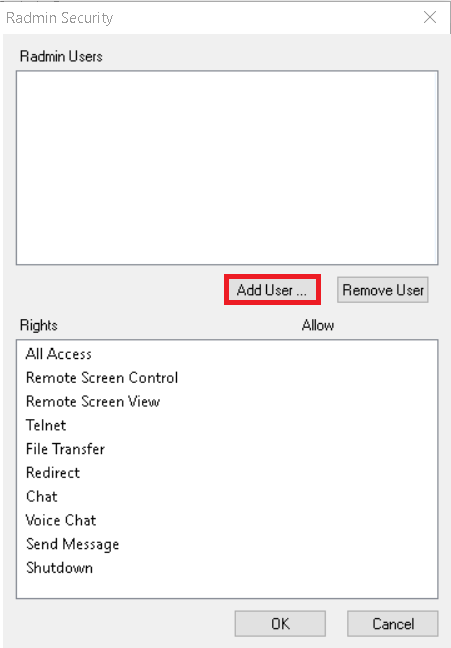 You are done with the settings of Radmin Server. 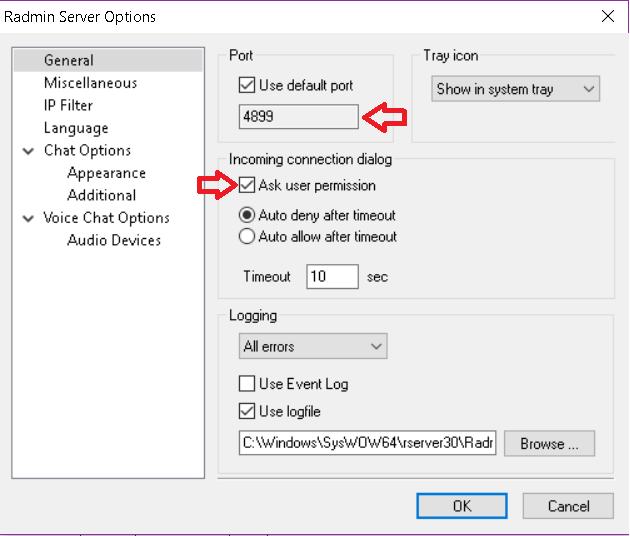 5. If the remote PC is located in the same LAN no additional setup is needed. Please proceed to step 6. If the remote PC is located in a different LAN or is behind a router please download Hamachi from here: Hamachi. Install Hamachi on your local and remote PC. Run Hamachi, click “Power On” button on the lower left part of Hamachi window. You will get a virtual IP address shown on the upper part of Hamachi window. This IP address will be used for connecting with Radmin. Then please click Create or Join Networks button on the lower right part of Hamachi Window – choose Create a new Network. Set a desired name and a password for your virtual network. Then on the remote PC please click Create or Join Networks button and choose to Join an existing Network, type in your network name and Password for joining a Network. After you are done, you will see that you will get two or more IP addresses shown while you point your mouse cursor over the Radmin Server tray Icon. Now you are done with setting up a virtual Network. Also, if you are willing to have a remote access to the workstation behind a LAN with setting up NO third-party software on each PC of if you are looking for accessing remotes from your LAN to the workstations located in different LAN you can use port-forwarding option. Please, read what port forwarding is here Port-forwarding. 6. Again on the remote computer make sure that Windows built-in firewall doesn't block Radmin connection. Open Start -> Control panel -> Windows firewall, go to Exceptions tab and add Radmin port 4899 as an exception. If you have a proprietary firewall (for example, ZoneAlarm or any other firewall software) refer to its documentation to find out how to create exception for a port. 7. On the local computer open Radmin Viewer, on the main menu click "Connection -> New connection". 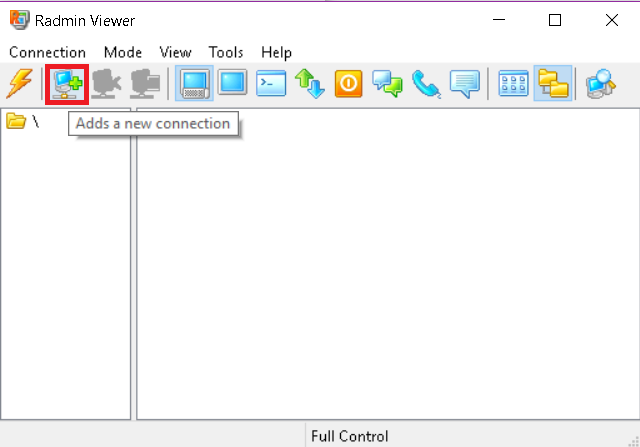 Enter the IP address of the remote computer into "IP address or DNS name" field. (You have to enter a Hamachi IP address in case if you are connecting over the Internet, please see step 5.) Enter a descriptive name of the connection and click OK. 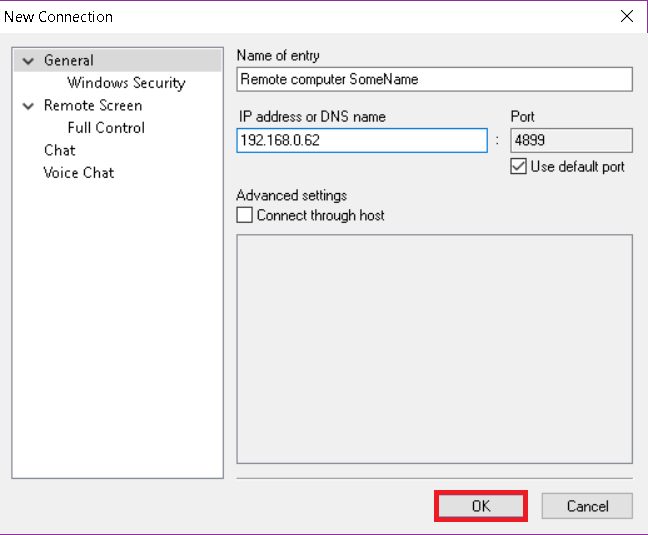 8. Now in order to connect to the remote computer in Full Control mode, right click on the newly created connection, and click Full Control in the context menu.  If you encounter any difficulties while setting up the Radmin connection please describe your issue below in detailed manner mentioning the steps at which you have encountered issues. Please also provide your Radmin license key. Please note that Radmin license key looks like this: RADPR-xxxxxxx-xxxxxxxx-xxxxxxxx. |